Detailed explanation of application effect and code of soil humidity sensor base on nodemcu/ESP12F
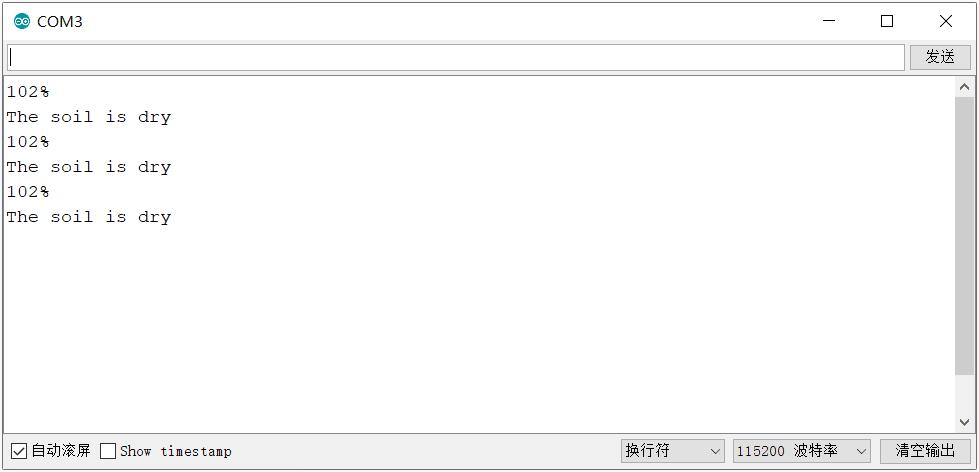
First, attach the effect drawing. In order to facilitate debugging and writing code, I use Arduino ide to write code.
Window monitor print real-time effect:
The hardware circuit diagram is drawn by myself and made by the merchant. The following figure is my actual hardware diagram.
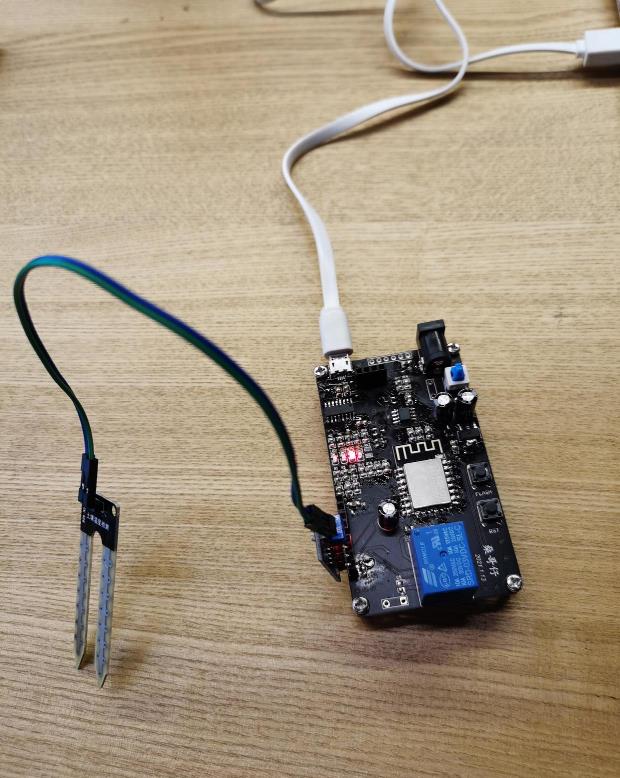
The soil moisture sensor I use is a resistance sensor.
Pin details are shown in table.
| soil moisture sensor | Wiring instructions | MCU |
|---|---|---|
| VCC | <—> | 3.3V-5V |
| GND | <—> | GND |
| DO | <—> | Digital output (0 or 1) |
| AO | <—> | Voltage analog output. |
Wiring between soil moisture sensor and nodemcu(ESP12F/ESP8266 can also be referred)
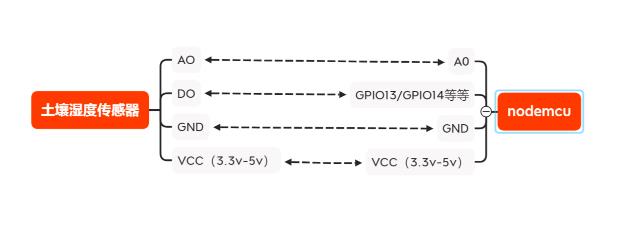
What is read in the code is the analog signal value. In fact, only three pins AO, GND and VCC are connected
Next is the code section:
/**********************************************************************
author:燊哥仔
bilibili Video Explanation:https://www.bilibili.com/video/BV1Lp4y1s7J4
The code is very simple. You can see the effect by using the serial port monitor of IDE
Actually connect three pins is OK AO、GND、VCC
**********************************************************************/
int sense_Pin = 0; // Soil sensor input connected to analog pin A0
int value = 0; //initialize variable value

void setup() {
  Serial.begin(115200);//Set baud rate to115200
  Serial.println("\n");//Newline
}

void loop() {

  value = analogRead(sense_Pin);//Analog data reading(A0 pin input data)
  value = value / 10;    //The above value divided by ten is assigned to value

  Serial.print(value);
  Serial.println("%");

  if (value < 50)//When the value is less than 50, judge the result
  {

    Serial.println("The soil is WET");//Window monitor print the situation
  }
  else
  {

    Serial.println("The soil is dry");
  }
  delay(1000);//Delay1 second. Read every second
}